Milk + Honey

Legend of the Boob: Common Myths and Truths About Breastfeeding

Breastfeeding, Extended Breastfeeding, ParentingMaria MengelComment

There are A LOT of breastfeeding myths out there. Sometimes they are enough to intimidate us into feeling defeated before we even start. Or, they’re enough to confuse us to the point where we question if we’re “doing it right.” Breastfeeding doesn’t have to be intimidating and confusing. We’re ready to tackle some of these myths and put your mind at ease! Keep reading to find out what WE think is the craziest myth of them all!


1. Breastfeeding is easy.

WRONG! While it is true that breastfeeding may have its conveniences, it is far from easy. It can come with its own challenges. Breastfeeding requires a lot of time and investment. It is said that on average a woman spends 1,800 hours breastfeeding in a year. It basically rivals a full time job, except with $0 salary. There also tends to also be a bit of a learning curve. It’s not something that comes naturally for everyone and work needs to be put in to foster a healthy breastfeeding relationship.

2. The size of your breast determines how much milk you produce.

NOPE! The size of your breast is determined by the amount of fatty tissue. Glandular tissue is what is responsible for milk storage and production. It includes the lobes that produce the milk and ducts that carry the milk. Small breasts do not equal insufficient glandular tissue. (Note: insufficient glandular tissue is a thing, but it is not characterized by breast size alone. Speak to your physician or a lactation consultant if this is a concern for you.)

3. You can’t eat certain foods.

NEGATIVE! Unless you find your baby has an allergy or intolerance, you do NOT need to change your diet. Just think of all the new foods, flavors, and nutrients you can expose your child to through your milk. You may find your baby gets more irritable with certain foods, but you don’t need to cut things out right from the start. Some exceptions to consider (for everyone really) are fish high in mercury, excessive caffeine, and alcohol.

4. Breastfeeding hurts.

WRONG-O! Yes, it’s true that you may feel some initial discomfort. Your nipples can be tender and your breasts engorged. However, any consistent and persisting pain should be evaluated by a lactation consultant to determine if there is a latch issue or something else underlying.

5. You can’t breastfeed when you’re sick.

FALSE…mostly. While there are certainly contraindications, for the most part, any minor illness you are fighting will produce and transfer antibodies to your baby through your breastmilk. You may have noticed, or will notice, a slight change in color with this milk. If you have concern about contact with baby during your illness, pumped milk will eliminate contact and still transfer antibodies for immunity. And of course, contact your physician with questions regarding specific illness and prescribed medications.

Check out the amazing difference between these two milks- one before a viral infection, and one during. Notice the change in color resembling higher antibody colostrum.

Image found at Parents.com.

6. If you can’t start right away, then you won’t be able to produce milk and breastfeed.

NEGATORY! If your baby is unable to latch right away, there are still things you can do to promote your milk supply! Skin to skin contact plays a key role in increasing hormones needed to produce. Keep your baby close as often as possible. Seeking out assistance from a lactation counselor to come up with an appropriate plan for pumping can also help get you started on the right track.

7. Milk “comes in” by day 3. If it doesn’t, you won’t be able to breastfeed.

FAKE NEWS! When your baby arrives, you are already producing colostrum. While many women report their milk “coming in” by day 3, for others it can take up to 5 days (or more.) The process can be very slow and gradual, and for others they may wake up one day completely engorged. There can be many factors that impact this feeling of fullness, including cesarean, iv fluids, pain medications used, length of labor, stress/birth trauma, blood loss, and retained placenta.

8. You have to wean your baby by age 1 or else they’ll never wean by themselves.

NO! Though sometimes it may feel never-ending, your child won’t go to college still breastfeeding. Promise. The average age of self weaning is between 2.5 and 4. Self weaning up to age 5, or longer, is still within a “normal” range. If self weaning is too much for you, then take on a mother-led, gentle weaning approach. You can read more about gentle weaning in previous blogs: links below.

9. Breastmilk after 1 year is “just for the mother” and has no benefit for the child.

UGH, NOOOOO! Breastmilk has no expiration date. It is constantly changing and adapting to suit your child’s needs. It does not stop being beneficial to your child on their first birthday, or by any date. The composition of breastmilk changes with your growing child, so at one year it has been found to have higher antibodies (think of those newly mobile kids putting everything in their mouths,) higher protein levels, and decreased carbohydrates. Don’t let anyone tell you it stops being beneficial at a certain time.

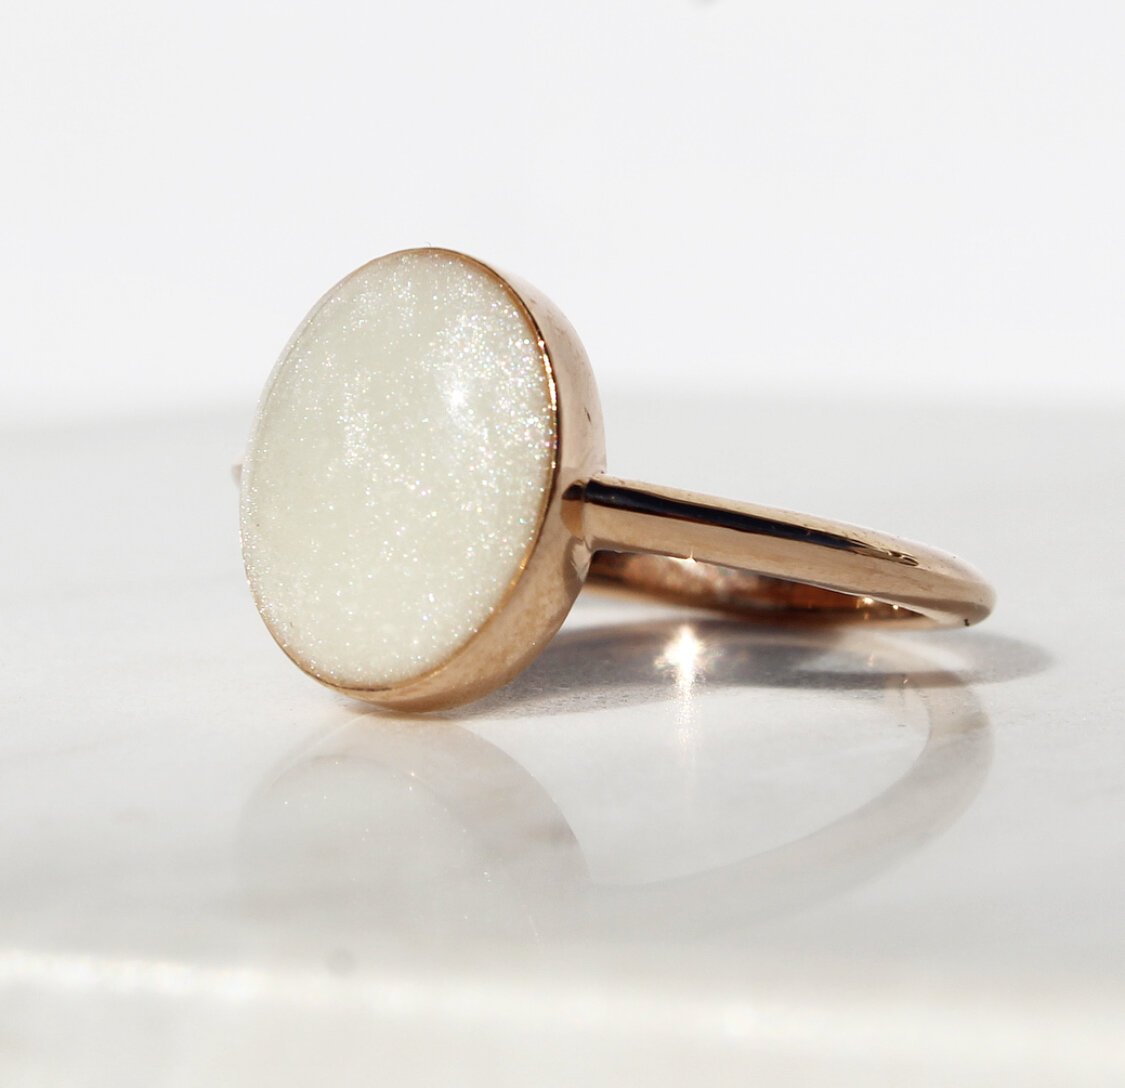
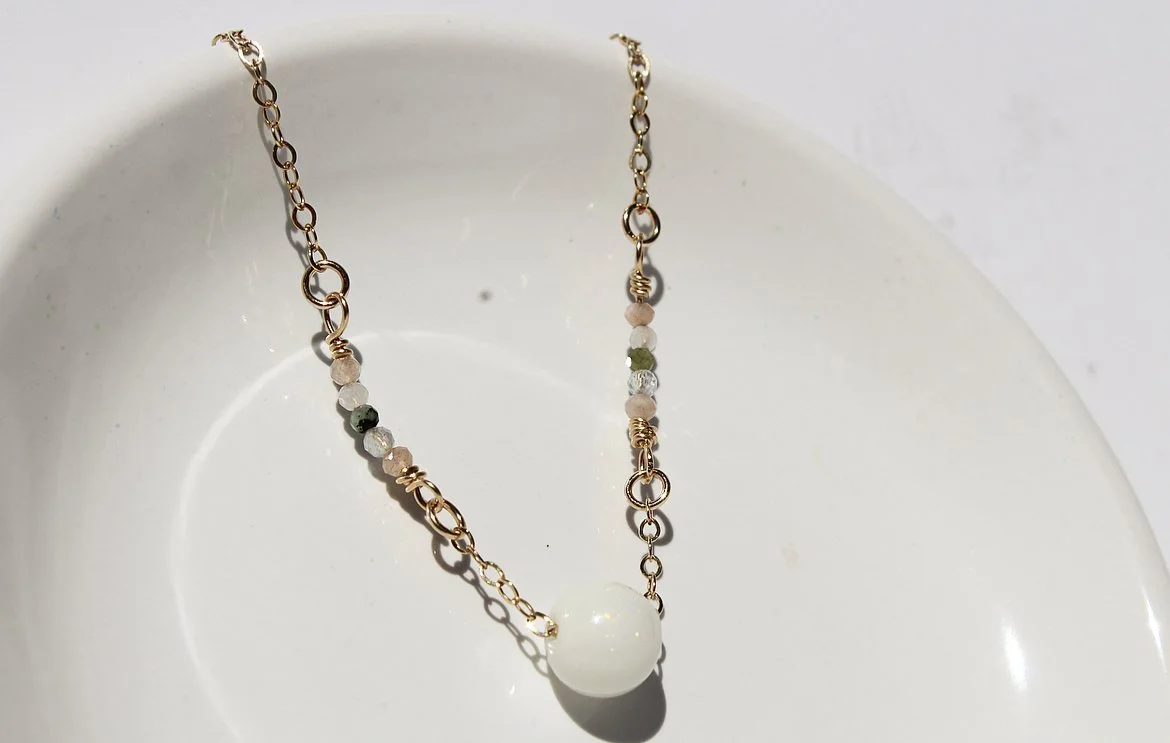
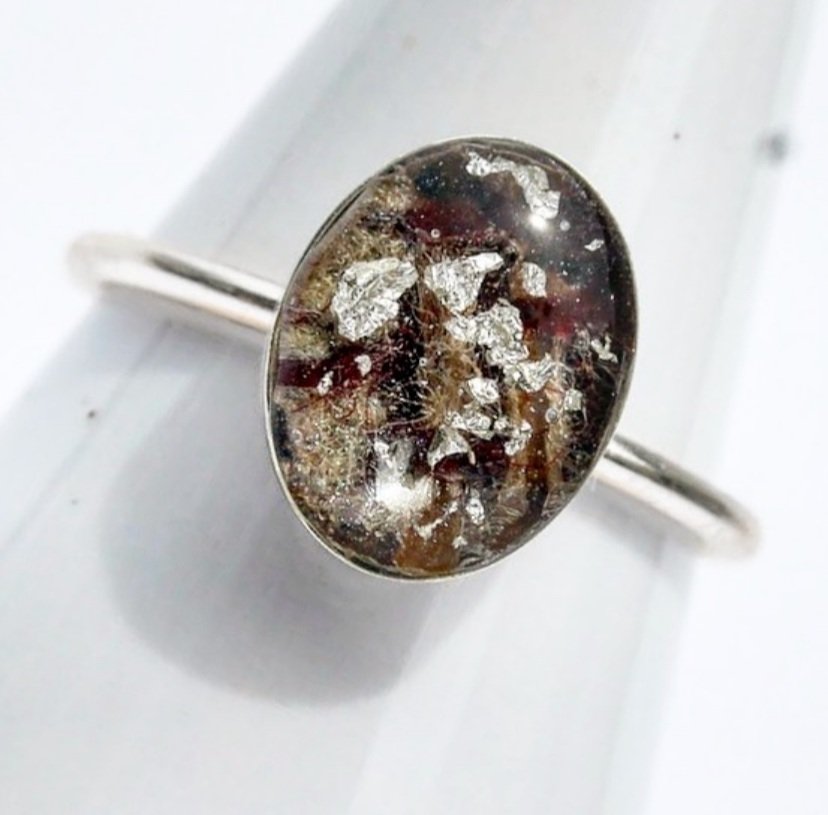
10. Breastfeeding is private and valuing and honoring your breastfeeding journey is WEIRD.

INCONCEIVABLE! You have spent countless hours along this journey. You’ve shared some incredibly beautiful and probably some incredibly difficult moments. Cherish them, honor them, and be proud of your accomplishments, no matter how smooth or ugly it may have been. Your precious memories preserved could look like this!

Alaina Leimbach, CLC (certified lactation counselor)

Office Administrator at Milk+Honey


What do you think of these common breastfeeding myths? Have you heard of any of these or have they played a role in your breastfeeding journey?


As a “thank you” for being an amazing supporter of Milk + Honey and reading to the bottom of this blog, we want to offer you a discount on anything in our collection! Please use code BLOG10 at checkout for 10% your order total.

Milk Preservation: How the Magic Happens

Maria MengelComment

Breastmilk jewelry. It’s not an entirely new concept. We’ve been around since 2018! But still, many people are just now learning about it. With breastmilk jewelry becoming more popular and more people learning about it, we are realizing that many customers still have a lot of questions about the process of milk preservation, so we’re here to do our best and answer all your questions about how we preserve and store your breastmilk! (And YES!!! We save your preserved breastmilk on file for you to use for future orders, so you don’t have to send more!!!)


Before we begin talking about how we preserve your breastmilk, I want to share just a little bit of information from the VERY beginning of our process - unboxing your breastmilk and inclusions. After you place your order with Milk+Honey® Jewelry, you will be sent an email confirmation with all the instructions on how to ship your milk and/or inclusions to us. Simply follow those directions to ship your breastmilk/inclusions using the shipping method and carrier of your choice! (And yes, there are reasons we have specific instructions. Deviating from those may cause your milk to leak or mold during shipping, so please follow the instructions carefully.)

When we receive your package, Stacy and Alaina will carefully open it, making sure they remove all the contents of the package. Using your milk that you labeled, they locate your order, label your milk and inclusions with name and order number, and mark your form with the date everything is received. All inclusions are kept with your order form. Your milk is then placed in a handy dandy milk storage container and placed in our “milk fridge” in order by date received. (We found THESE storage containers on Amazon and LOVE them for storing breastmilk and lots of other things in the studio!!! They’re perfect if you pump and freeze breastmilk - or even to organize snacks in your pantry!) After your milk is labeled and stored in our fridge, your information is entered into a spreadsheet organized by date. Order forms, including attached inclusions, are organized and filed by the date received. Stacy and Alaina do an amazing job at keeping everything organized in the studio and know where everything is all the time! Your milk, flowers, umbilical cord powder, cremation ashes, placenta powder, lock of hair, etc. is safe in their hands!

We preserve all milk in the order we received it, according to our dated milk bin system. When it’s time to preserve milk, we set up our milk preservation station, pull the next container in line and get to work. We pull ONE milk at a time, making sure EVERYTHING is labeled with your name and order number, checking and verifying, so we don’t get anything mixed up. They carefully measure the amount of milk they need and add it to a warm nonstick skillet, letting the milk heat up just a bit. The preservation powder is added and slowly mixed into the milk until the mixture reaches a toothpaste-like consistency. This usually doesn’t take too long, but all milk is different and some require a little extra attention and time. Once the right consistency is achieved, the mixture is scooped from the pan and spread in a thin layer on a piece of parchment paper (that has been labeled with your name and order number) and placed in our drying rack to sit for a couple of days. Once that milk has been stored for drying, we clean the pan and pull the next customer’s milk and repeat! Leftover liquid breastmilk is placed in a milk bin that corresponds to the drying rack used. This milk is saved until we are sure that there were no issues during the preservation process.  This rarely happens, but we prefer to play it safe and hold onto it until we know the preservation process is successful! Depending on the weather (hot, cold, humid, dry), your preserved milk will dry anywhere from 24 - 72 hours. 

Once the milk mixture is completely dry, we carefully transfer the mixture (one milk at a time) into a small, stone mortar where we crush the dried milk by hand into a fine, baby powder-like consistency. This can take anywhere from 2 minutes to 10 minutes for each individual milk. All breastmilk is different and unique to each woman and baby, so they all preserve and dry differently! When the milk is completely crushed, it is placed inside a small, plastic bag that is labeled with your name and order number. Once this is complete, we toss the remaining liquid milk. We enter the date the milk was preserved on our spreadsheet (so we can email each customer with the update) and the preserved milk is then paired with the customer’s order. If we have the jewelry components for that order, they are also paired with the milk and order and then placed in the queue for the order to be made. If we do not have the jewelry components, the milk is stapled to the order and placed in the appropriate file to wait for the jewelry. Once the jewelry is received, it is paired with the milk and order and placed in the queue for the order to be completed.

All preserved breastmilk that we have on file is stored in these storage bins by order number!

After the order has been completed, the jewelry and order form are placed in the “inspection bin” for Alaina to inspect the order before packaging and shipping out. She carefully reads your order form to ensure the jewlery is designed as requested and there are no flaws. The preserved milk powder is placed in a designated bin for Stacy and Alaina to file later. We store ALL preserved milk on file by order number. If a customer has multiple order numbers they are all included on the bag and filed by the most recent number. When a customer sends more than one bag of milk, we also label each milk with the child’s name or birth year (however the customer designated the milk on their order form). These milks will be stapled together to ensure they stay together.

Below are some FAQ regarding milk preservation:

I ORDERED MORE THAN ONE PIECE, DO I NEED TO SEND MORE THAN ONE BATCH OF MILK?

NO. 15 ml of milk is ALL we ask for regardless of what piece you order from our collection or even how many pieces! You do not need to send 15 ml of milk for each piece. Each batch of preserved milk is enough to make approximately 12-15 pieces of jewelry (depending on which pieces you order).

I WOULD LIKE TO ORDER MORE JEWELRY IN THE FUTURE, CAN I SEND IN MORE THAN 15ML NOW AND YOU KEEP IT ON FILE?

Please don’t. We do not save your milk in liquid form. If you send more than the requested amount, we will not preserve “extra” or save the extra milk. We simply do not have the space to save milk in liquid form, so sending more is unnecessary and any leftover milk after the milk has been preserved will be tossed. We hate tossing milk, so please don’t send more than what is needed. Again, each batch of preserved milk is enough to make between 12 and 15 pieces of jewelry.

I SENT MILK IN 2020, DO YOU STILL HAVE IT ON FILE?

YES! We save all preserved breastmilk for future orders! We began this process in October 2019, so if you order after that date, we have your preserved milk on file! So go ahead and order the matching earrings to your ring! There’s a place to let us know that you would like to use the batch of milk we have on file during the checkout process when you place your order. At the time I am writing this blog, we have not had anyone use their entire bag of preserved milk, but if we ever do, we will email you to let you know that you’ve used all of your preserved milk on file. 

I DIDN’T BREASTFEED, CAN I SEND IN FORMULA?

YES! We can preserve formula! If you do not have breastmilk because you didn’t save any or didn’t breastfeed, we can also preserve formula to use in all of our jewelry! We ask that add water to it and ship it in liquid form.

I WOULD LIKE TO USE TWO BATCHES OF MILK FROM TWO CHILDREN IN ONE PIECE OF JEWELRY. CAN I DO THAT?

YES! You can use more than one batch of preserved milk in all of our jewelry. If you have more than one child, we can preserve the milk individually and combine some of the powder from each to complete your order. The milk is kept in separate bags and only a little of each is combined if you choose this option, so you still have the option to use each bag of milk individually down the road. (NOTE: there is an additional processing fee if you choose to send in more than one batch of milk for one piece of jewelry. Please see our FAQ or contact us for more information.)

I HAD WHITE PIGMENT/PEARL SHIMMER ADDED TO MY FIRST ORDER. DOES THAT MEAN MY NEXT ORDER MUST HAVE WHITE PIGMENT/PEARL SHIMMER?

NO. We do not add the white pigment (or pearl shimmer) to your entire batch of preserved milk. The white pigment (or any colored pigments, glitters, or flakes) is added to the milk mixture when we are crafting your jewelry. This means if you want white pigment added to your jewelry, you will need to specify which piece(s) you would like it added to and on every future order.


And that’s it! That is how we preserve milk and store it on file for our customers to use for future orders. When we receive an order from a customer who is using milk we already have on file, it is clearly marked on the order form when the order is processed and sent to the studio. Stacy and Alaina can go to our milk storage bins and find the preserved milk by the customer’s previous order number. We don’t have to preserve more milk, so the process for completing the order is usually quite a bit faster (depending on what the customer ordered! Each batch of preserved milk is enough to make approximately 12-15 pieces of jewelry (depending on which pieces you order).

Terri - General Manager at Milk + Honey Jewelry

Edited by Alaina - Office Administrator


As a “thank you” for being an amazing supporter of Milk + Honey and reading to the bottom of this blog, we want to offer you a discount on anything in our collection! Please use code BLOG10 at checkout for 10% your order total.

Sex and Breastfeeding -- YUP, we're going there.

Maria Mengel2 Comments

True story: Six years ago I hosted a special Valentine’s Day La Leche League meeting called “Sex and Breastfeeding”... and I wore this sperm and egg dress.  

Somewhere in the last six years I’ve lost the ability to wear anything but black shirts and black pants.  Not goth or emo… just because it makes dressing myself very easy and I don’t have to utilize my brain power for wardrobe decision making. 

I’ve spent a lot of Valentine’s Days breastfeeding over the years, and I can tell you one thing for sure.  Being a breastfeeding mother can have a serious impact on your physical intimacy with your partner!  So I’ve put together this list of ways that breastfeeding affects your sex life.  You know, in case you’re in that same boat.  And especially if you want to…. *cough* celebrate tonight.

One thing to note before we get started:  these are all so widely varied between mothers and couples!  One thing can be the case for me and my husband, and even though it’s the polar opposite for you and yours, *both* can be normal.  Give yourself grace, remember that this is a phase (even if it doesn’t feel like it will ever end), and don’t forget to nurture your relationship with your spouse when you can.


You’re touched out. 

You have a little person (or two or three or more) attached to you all day.  Pulling on your clothes.  Probably pulling your hair.  Snuggling you.  Asking you to hold them.  AND there's breastfeeding. A baby/toddler is literally suckling at your breasts… ALL. DAY. LONG.  The overstimulation of physical touch is *normal*.  And not to mention, you are probably EXHAUSTED.  I remember days where I would finally get to the end of the day and my baby would be asleep and I knew that I only had a few hours until they were awake again to nurse… and the literal last thing on my mind was sex.  HA!  Repeat after me: it’s just a phase.  It’s just a phase.  It’s just a phase…


Decreased Sex Drive

Those stinking hormones.  Not just after giving birth, but for the duration of your breastfeeding experience, you’ll have hormone fluctuations that can impact your libido. High prolactin levels (responsible for stimulating milk production) can dampen estrogen levels, and in turn, sex drive.  THIS IS NORMAL.  Sharing this info with your partner may help, so that you’re on the same page.  This is a *phase*, and as your baby begins eating more solid food, and/or as you begin weaning in the future, your hormone levels will find their baseline again eventually.


Milk Release During Sex

SAY WHAT?!  If this has happened to you, you might be like “WTF!?”.  But it’s actually super common and normal (and it’s also normal if it doesn’t happen, so don’t freak out!). More hormone stuff!  When you have an orgasm, you release oxytocin, and when you release oxytocin, it can trigger a letdown.  


Breast/Nipple Stimulation During Sex

This is another thing that is so different for every woman/couple!  If your breasts are stimulated during intimacy, “it” may happen.  Yes, “it” being a letdown.  If you have engorgement, or are going through a nursing transition, clogged duct, or anything like that, you may have pain when your nipples/breasts  are stimulated.  In which case, just forgo the breasts altogether and focus on the other areas :) If they have to be out-of-bounds for now, it will make it all the more exciting when they are fair game again! 


Vaginal Dryness

Believe it or not, this can be related to breastfeeding. And believe it or not, it’s all about hormones again.  That lack of estrogen (and subsequent lack of ovulation and cycling) can decrease natural vaginal lubrication.  Drink lots of water and use a lubricant when necessary to prevent painful sex!


What are some other ways that being a breastfeeding mom or a mom of young kids can affect your sex life?  Share in the comments!  And whether you’ll be celebrating between the sheets tonight or not, here’s a discount code to celebrate Valentine’s Day with a new piece of breastmilk jewelry… or if your spouse forgot to buy you something and now owes you one 😉


One last thing:  if you don’t have a spouse this Valentine’s Day, I’m sending you a virtual hug. You are loved <3


How To Get Well Fast When You're A Parent

Maria MengelComment

**Disclaimer: Nothing in this blog post should be considered medical advice. We are NOT medical professionals, just moms who have been there. Please seek medical attention if necessary.


Sickness is out there. It’s all around us. While we do our best to avoid it and build our immune systems, there will come a time when we catch a bug going around and get sick ourselves.

We wrote a blog a couple of years ago with some tips and tricks on how to help your child when they get sick, but we thought it might be a good idea to write another one with some tips and tricks for moms (and dads) on what to do when illness sets in.


Just like we mention in our blog “What To Do When Your Child Isn’t Feeling Well”, the best way to start feeling better as quickly as possible is to be prepared! Having a well-stocked medicine cabinet can really help you start fighting those germs at the first sign of sickness – giving you the best chance of a faster and easier recovery! Keep your medicine cabinet in an easy to access location and preferably, keep everything in a box together! We have one for kids and one for adults, so it takes that much less brain power when you’re already functioning at less than 100%. 

Here are some items we love (and swear by) that you will find in our medicine cabinets:

  • Electrolyte Drink (LMNT & Liquid IV are great because they come in ready to mix packets so they don’t take up much space! LMNT can be ordered online, although it can be found in some small retail stores, but Liquid IV is now available in most grocery stores, including Walmart and Target.)

  • Herbal Tea (Lemon, Ginger, Green Tea, Citrus Tea, Mint Tea, Echinacea Tea, or blends that support Immune System and Wellness)

  • Oscillococcinum – The sooner you start taking this, the better it works!

  • Tinctures – I love the Feel Better Fast and Elderberry from Earthly Wellness – as well as many others from them!

  • Fermented Honey* (more on this below. While it can last months or even up to a year on the shelf, it takes at least 30 days to fully ferment, so think ahead and make some BEFORE you start feeling under the weather)

  • Cold and Sinus meds of choice (Boiron is a great brand we trust in our home for a natural option)

  • Epsom Salt (for a bath soak)

  • Heating Pad or Hot/Cold Compress

  • Pain Reliever/Fever Reducer

  • Sinus Rinse and Solution (having the device on hand isn’t enough – you need the solution to go in it! Or you can make your own - recipe** below.)

You can check out all of our favorite all natural products on Amazon!!!


How to feel better fast

*Fermented Honey – I mentioned this above as an item to have ready for when you start feeling sick. There is so much good germ fighting, natural antibiotic properties in this it’s crazy! It can help with almost anything from a cold to a sore throat and possibly even some minor infections!  There are different types of fermented honey (I have tried Garlic Fermented Honey and Lemon Ginger Fermented Honey, personally). Check out our Pinterest Board for some different ideas! The one thing they all have in common is they use RAW honey. It is important to note that “pure honey” and even “organic honey” won’t work unless it’s raw for the fermentation process to actually happen. Once again, this typically takes about 30 days for the fermentation process to complete (although I have used it before the 30 days is up, it just doesn’t have the full effect), so you might want to make up a batch while everyone is well and healthy. It has a long shelf life, so you’re sure to use it before it goes bad.

**Sinus Rinse Solution Recipe - In a clean container, mix 3 teaspoons of iodide-free salt with 1 teaspoon of baking soda and store in a small airtight container. Add 1 teaspoon of the mixture to 8 ounces (1 cup) of lukewarm distilled or boiled water. Use less dry ingredients to make a weaker solution if burning or stinging is experienced.

At the first sign of sickness - I start making myself hot tea – and lots of it! I usually alternate between hot tea and a glass of plain water (adding some LMNT to one glass a day). Most herbal teas will help support your immune system in some way or another, so it’s really a matter of your personal preference. I’ve really enjoyed mixing some green tea with some lemon ginger tea (I added in my fermented lemon ginger honey, too!), but the copycat Starbucks Medicine Ball recipe is great, too! You can make your own lemonade or just use lemon juice if you prefer. (Again, have this on hand and ready to go so you aren’t running out the store at the last minute!)

Some other “go-to’s” I start at the first signs of illness are my Feel Better Fast by Earthly Wellness and a dose of Oscillococcinum (or other homeopathic medicine by Bioron). While these can be taken at any time, taking them early on can lessen your symptoms and has been shown to help you get over your cold, flu, or whatever other virus you may have picked up more quickly.


I think one of the hardest parts of being sick when you’re a parent is that there are still tiny humans who still need and depend on you. They don’t understand that it’s taking every bit of energy you have to get out of bed or off the couch and their needs certainly don’t stop just because you’re sick. While it does get easier as your kids get older and become more self-sufficient, being sick with toddlers and babies is tough! Some of the things I’ve learned during the times I’ve spent sick with babies may be helpful for the mom who might still be in the thick of it!

best home remedies

REST! If you have kids that still take naps – use their nap time as an opportunity to get some rest yourself. I know there’s always a laundry list of things to do, but if you’re fighting sickness, getting better needs to become a pretty top priority! (YES – YOU need to put yourself up high on that priority list when sick! This is your permission to do so!) Let the laundry and chores wait for another day – get some extra sleep or use that time to take a hot bath, because a rested body can recover faster!

best home remedies

Take a hot bath! The steam can help with congestion and adding some epsom salt can help add magnesium back into your system (something most of us lack already). A hot bath can help with aches and pains from illness but also forces you to get some rest – something that can be difficult for us to do, especially if it’s “just a cold”. 

Screen Time is your friend! Most of the time, even when I’m sick, I have enough energy to at least get myself to the couch, however, last summer, I fought a fever of 103 for 5 days and barely had the energy to get myself out of bed to go to the bathroom! A trick I learned during that time was I pulled my preschooler in bed with me (she was also slightly sick, just not as bad as me) and I just let her watch TV and play on her tablet. When you’re fighting sickness, screen time isn’t something you need to worry about. Use it to your advantage and let the screens babysit a bit. Whether you’re on the couch or in bed, whether it’s a TV or tablet, this is certainly one of those times when screens are a blessing and aid in helping you get some much needed rest!
Need a quick and easy meal? This Chicken Noodle Soup recipe is pretty simple, quick, and easy to throw together and I swear it has some major healing properties! If you have the energy to cook, give this a try! These are staple items I typically keep in my house, so when sickness hits, I’m able to whip this up pretty quick and at the first signs. My kids also love it, so even if I’m the only one who's sick, they’ll eat it up! You can also check out some of our previous blog posts for more quick and easy dinner ideas!

Ask for help! If you have family or close friends in the area, don’t be afraid to reach out and ask for help. If your kids are also sick, this may be a bit more complicated to pull off, but if it’s just you, see if anyone is available to watch your kid(s) so you can rest and recover. Or if they aren’t available to watch your kids, maybe they can simply bring dinner! Anything taken off your plate is one less thing for you to think and worry about.


Illness is out there and while we do our best to protect ourselves from it, sometimes our kids bring germs home or we pick them up in our day to day interactions. While you may need a medical professional sometimes, many times, some rest and home remedies may be all that’s required. We hope this information is helpful and you are able to be prepared for whatever sickness may come your way!

What are some of your favorite home remedies, tips and tricks for when you aren’t feeling well?

Terri - General Manager at Milk + Honey Jewelry


**Disclaimer: Nothing in this blog post should be considered medical advice. We are NOT medical professionals, just moms who have been there. Please seek medical attention if necessary.


As a “thank you” for being an amazing supporter of Milk + Honey and reading to the bottom of this blog, we want to offer you a discount on anything in our collection! Please use code BLOG10 at checkout for 10% your order total.

How To Work From Home with Kids

Family Activities, ParentingMaria MengelComment

Working from home isn’t an entirely new concept, but it’s definitely become much more common since the pandemic. Not long after everything shut down, everyone started trying to figure out how to keep their businesses running while staff remained at home. This led to many companies figuring out how to allow employees to continue to work from home, which is a wonderful blessing for many parents since that may open the door for them to no longer need childcare. However, for those same parents, trying to figure out how to work from home while you also manage your children is tough!

So for those of you “work-from-home moms” who are either just starting out your working from home life or have been in it a bit - here are some tips that I have found that might help your daily schedule run a bit more smoothly!


Let go of the idea of “perfection”

I teach my kids to set high goals, but also, teach them that it's OK to fail sometimes. I may start out my day with 100 tasks on my “to-do” list and by noon, I probably have 103 - and that’s with checking some off! I set high goals for myself in hopes that everything falls into place “just right” (because every now and then it does), but I also understand that getting “all the things” done may not be reasonable every single day. It’s OK to let that clean load of laundry sit another day (or week). At least the clothes are clean, right?! When we let go of the idea of perfection, we take the pressure off, which can actually make us more productive! 

It’s also important to remember that working from home won’t look like working in an office! You may think this goes without saying, but it’s easy to slip into the mindset of comparing. The way you set up your day, the way you focus, the way you tackle projects - it’s all different! Especially when you have kids to tend to! Give yourself some grace and be open and honest with your co-workers and clients/customers. They’re pretty understanding if you’re on the phone and need to take a second to address your child. (Trust me! I’ve been there!)

Make a “To-Do” list

I actually picked this tip up from Maria. She’s shared her “to-do” lists many times on social media and it motivated me to give it a try myself. As mentioned above, I put everything, and I mean EVERYTHING on my to-do list. Even “drink water”! I write it at the top and add a tally for every time I refill my cup/bottle. I add the tasks I need to do for work to my list as well as my household tasks/chores, soccer/dance/wrestling practice - all of it! I even put what time I need to start making dinner so I don’t forget! I do my best to prioritize my list by starting with the items that are most important and at the end of each day, whatever is still on my list, I just add to the next day. Folding and putting away laundry is on my list almost every day.

I had actually gotten out of the habit of doing this for a bit and I have found that it’s so much harder for me to focus! I’m more easily distracted by all the things that need to get done that I forget some of the more important ones! When they’re all listed out, it’s easier to prioritize things so that you can make sure the really important things don’t get missed! While you don’t need a fancy notebook to make a “to-do” list, having something cute where everything is written down in one place is handy. You can pick something up from your local WalMart or Target, or we also really like this cute one we found on Amazon.

Set a schedule for yourself

One of the wonderful things about working from home is the flexibility it offers you. However, if you aren’t careful, you can find yourself working all day or during the evenings during what should be “family time”. I’ve certainly learned this one the hard way! I wake up with plans to start work after I get the kids breakfast and the kitchen cleaned up, but this and that pull my attention away throughout that process and next thing I know, it’s almost lunch and I haven’t even started! While I am still flexible with my schedule, I do my best to have a definitive “start” and “end” to my day when it comes to work and also set up clear breaks in my day to take care of the kids and their needs. There are always days when things don’t go as planned or I opt for an impromptu trip to the park, leaving me having to hop back on at the end of the day after my kids go to bed, but having a schedule at least gives some guidelines to your day and helps you be more successful in getting your tasks done on time.

Schedule an activity for your kids 

If you have younger kids, you might be able to get away with doing the core of your work during their nap times. Those couple of hours of silence are golden and you really can get so much more work done when there aren’t tiny humans needing your attention! However, if you’re like me and have older kids, this doesn’t really work. What I have found that works well for us is to find an activity or project my kids can do independently. We are a homeschool family, so I was able to set up my day so that I can typically focus on work while my boys are sitting at the same dining room table doing their schoolwork**. I give my daughter (4) tablet time (she has a LeapPad Epic and I love that literally everything on her tablet is educational) or have her work on puzzles or playdough during this time (I have a basket of quiet activities she can do by herself). There have also been times when I need more than that couple of hours in a day to get everything done and I have found that selecting a movie and popping some popcorn is a great way to keep them quiet and out of my hair while I focus on work. There are endless possibilities and if you take just a little bit of time to plan something for them, you will find that you will be able to get more done without being interrupted 1,000 times.

**I spent a lot of my summer researching different homeschool programs and curriculums and finally settled on an online program that requires less of my involvement. This is what works for our family in this season. If you are in the same boat, you can read more about all the choices and options for homeschool/public school/private school in another blog we shared over the summer.

Hire a sitter/Look for part-time daycare options

I realize that one of the advantages for parents who are working from home is that you don’t have the expense of childcare, so this may not work for everyone, but I have found that it is well worth the expense to have a part-time sitter to watch my daughter just one day a week for a few hours. I am able to get so much done in that amount of time! Knowing I have a sitter one day a week also allows me to set up my “to-do” lists in such a way that I can focus on tasks that need my full attention on those days. I was able to find a daycare that would take my daughter just one day a week for a while, then I had a good friend who was able to take her one day a week. For you, you might not need a sitter weekly, but maybe bi-weekly or even monthly would work best. Maybe you can take your child(ren) to the sitter or maybe they will come to you! Maybe you have a friend who also works from home and you can take turns watching each other's kids! There are so many options out there, you just have to think outside the box!

Set-up/Prepare a designated “office” or “workspace”

While I can certainly work from anywhere in the house (and I do switch it up sometimes), I have a desk in my bedroom upstairs that I prefer to work from. I also have a designated area at our dining room table that I like to work from when my kids are working on their school work. Depending on what task(s) I am working on will sometimes determine where I work, but having a space or area that stays clean and is easy to set up quickly when I am ready to get to work makes it much easier to start working (instead of getting distracted by all the cleaning that needs to be done) and end my day when it’s time. I also find it helpful if I enjoy the space, so splurge a little and decorate your work enviroment so it’s a place you enjoy being!

Check out this “Work From Home” list of our favorite products to help get your space set up!

Don’t forget to schedule family time

As mentioned above, one of the big advantages of working from home for many people is that they have some flexibility in setting up their schedules! However, one of the down sides is that if you aren’t careful, your work schedule can quickly take over family time. (This is also where having a set “end time” comes in handy.) Between homeschool and extra curricular activities, I have often found myself working in the evenings when I can really focus on work and not have to tend to the kids so much. However, a big disadvantage of this is that it becomes very easy to miss out on time together as a family. I have found myself more than once running upstairs not long after my husband walks in the door saying “I’ll just be a quick 30 mins then I’ll be back down”, only to have that 30 mins turn into an hour or two and before I know it, it’s bedtime or the kids have already been put to sleep! When I take a moment to plan my family time into my day, I can schedule my work hours around that time, so it isn’t missed.

Check out some of our other blogs for some “family time” ideas for each season!


Check out this “Self-Care (Mom Care)” list of our favorite prodcuts to help you unwind from a long day of wrangling kids and clients! Need more ideas for self care? Check out this Self-Care Blog!


I know this is a lot of information and a lot to take in! While this is some of what I’ve learned from my experince as a work from home mom, I’m sure there are other ideas and tips out there that may benefit you on this journey. I hope this information was helpful!

What tips have you found helpful and beneficial in your work from home journey?

Terri - General Manager at Milk + Honey Jewelry


As a work from home mom, have you found yourself struggling with “mom guilt”? Check out this blog for how to overcome it!


As a “thank you” for being an amazing supporter of Milk + Honey and reading to the bottom of this blog, we want to offer you a discount on anything in our collection! Please use code BLOG10 at checkout for 10% your order total.


How to Choose a Jewelry Design

Maria Mengel1 Comment

You’re thinking about purchasing breastmilk jewelry and you’re excited to have this new piece to wear to remember your journey…   and then you can’t make a decision because there are SO MANY decisions to make!  Don’t worry: we’ve got you covered. 

Follow these simple steps and you’ll be ready to press “complete purchase” in a few moments.

The first thing I need to share with you is that if you’re feeling very conflicted: GO SIMPLE.  You will not regret a beautiful, classic, simple piece of jewelry with your breastmilk.   I mean, honestly, look at how gorgeous this is:

The second thing you need to know is that we treat our customers like GOLD.  If you order something simple and want to try a new or more intricate design next time, well you’re in luck.  We always save preserved milk after crafting your jewelry, so we will have your milk here on hand indefinitely in case you want to order again! It will make your ordering process easier, you won’t need to worry about sending us more milk, and it will probably make your turnaround time even faster, too!  Plus, we regularly share special sales, discounts, and promotions for past customers to add to their collection.  Once you’re in, you’re a member of our family and we wanna spoil you ;-)  Many of our customers choose a simple ring to start, and then add a necklace or earrings to their collection later.

If you’re sure you want something with a little more “pop”, but don’t have a specific vision, here are some things to consider:

Do you want to include your child(ren)’s birthstone(s), or a specific color?

Do you want to include your child(ren)’s lock of hair?

Do you prefer more classy/simple looks, or more abstract/creative?

If you want to include your child’s birthstone(s) or have a specific color in mind, you can do that with flakes, glitter, pigment, or a birthstone add-on to your necklace.  Scroll through these and whichever one makes your breath catch and makes you say “wow!”, THAT'S the design that you will treasure.  Going with your gut will never lead you astray!


Flakes or glitter down the side

Rose gold oval ring with breastmilk, pearl shimmer, and copper and pink flakes down the right side edge

Flakes in opposite corners

Rose gold oval ring with breastmilk, pearl shimmer, and copper and dark purple flakes grouped in opposite corners

Full stone pigment

Each silver stacking ring has breastmilk and pearl shimmer, and pigment to represent the birthstones of their children: January, March, November, and September

Birthstone add-on to necklace

If you want something simple, but still would like to represent your children’s birthstones, how about adding on birthstone beads to any of our necklaces?!

Yellow Gold Pearl choker with 8mm breastmilk bead with breastmilk, pearl shimmer, and opal flakes. Added 5 birthstone beads on each side.

If you love some of these designs, but don’t necessarily want to include your birthstone color or any colors, just stick with yellow gold, copper, or silver flakes or glitter.  So beautiful, elegant, and will match everything in your wardrobe!


If you want to include a lock of hair, here are the most common ways to do that.  Again, whichever one makes your breath catch is your WINNER:

Hair curved down side 

Yellow gold Oval ring with breastmilk, pearl shimmer, and lock of hair curved down right side.

Hair in a heart

Silver oval ring with breast milk, lock of hair, pearl shimmer, and red poppy petals

Swirl

Yellow gold classic round charm necklace with breastmilk, pearl shimmer, lock of hair swirl, and yellow and copper flakes

If you feel like you need a more unique design, but can’t quite commit, please remember that ALL of our pieces are unique and special to you because they are made with YOUR milk.  No one else will ever have jewelry exactly like yours.  Grab a necklace with just breastmilk and maybe a little pearl shimmer, and when you land on a vision that makes your heart sing, take advantage of our customer loyalty sales and purchase a matching ring with a fun and more creative design!  


As always, if you need help designing your jewelry or have questions, please contact us so we can help you craft a piece that you will love!


As a “thank you” for being an amazing supporter of Milk + Honey and reading to the bottom of this blog, we want to offer you a discount on anything in our collection! Please use code BLOG10 at checkout for 10% your order total.

Our Favorites from 2022

Maria MengelComment

As we wrap up another year and 2022 comes to a close, we wanted to take a look back over this past year and the beautiful creations that have been made. Meghan and Ashley do such an amazing job crafting and designing these pieces with such care and attention to detail, even when creating the most simple of designs! While we are truly honored to create meaningful pieces for each of our sweet customers and their beautiful stories, we wanted to highlight a few of our favorite pieces from this past year! (as well as some of our all-time favorites!!!)


Maria’s Favorites

Breastmilk Earrings

These Swaddled Pearl Earrings in Solid Yellow Gold - “We released the swaddled pearl earrings this year! These are actually MY earrings with MY milk!“

Breastmilk necklace

This Oval Charm Necklace in Rose Gold with breastmilk and a lock of hair - “I just LOVE the shape/swoop of the hair, and the contrast between the hair, the white milk, and the rose gold.”


Meghan’s Favorites

Oval Breastmilk Ring

This Oval Ring in Yellow Gold with a smooth band. Breastmilk stone with two locks of hair crossed over the top. Paired with three Yellow Gold Stacker Bands - one braided (top), one beaded, (third) and one hammered (bottom).

Oval Breastmilk Ring

This Oval Ring in Yellow Gold with a hammered band. Breastmilk stone with umbilical cord flakes placed at a diagonal and some gold flakes mixed in.

Breastmilk ring

This gorgeous Heirloom Oval Ring in White Gold with a black, purple and blue galaxy design.

Heirloom Oval Breastmilk Ring

This Heirloom Oval Ring in White Gold with a black “galaxy” design.

breastmilk ring

This Classic Round Ring with animal cremation ashes, black pigment, and gold flakes.

This Oval Ring with mountains (from a lock of hair) and the northern lights.


Stacy’s Favorites

These are Stacy’s personal earrings - “They are silver Classic Round Earrings with my hair and my mothers hair shaped into a crescent moon with opal flakes and blue.”

This Petite Feather Wrap Ring (no longer available - SORRY!!!) with flower petals.

[Love this ring? Make it yourself with our DIY Kit! You can find a similar ring on Etsy!]

breastmilk ring

This Oval Ring with a tree design make from locks of hair and bithstone colored flakes.

breastmilk ring

This Classic Round Ring with cat cremation ashes, gold flakes, and three different colored locks of cat fur.

This Classic Round Ring with just breastmilk - a simple, yet beautiful design!

breastmilk ring

This Classic Round Ring with blue pigment and some extra shimmer. Made with a lock of hair in a “swirl” pattern.

(I think it’s easy to see that Stacy like the "Classic Round Collection” design! Haha!


Alaina’s Favotrites

keepsake Oval Ring

This Oval Ring in silver with a smooth band. This customer sent in a piece of fabric that was special from her grandfather and we added some silver flakes. - “I love it because I love the meaning behind it. Something seemingly insignificant turned into a beautifully preserved memory”

heirloom oval ring

These 8mm Pearl Earrings with breastmilk, pearl shimmer, white glitter, and light blue pigment - “These pearl earrings because that white glitter is incredible in real life (which is huge for me to say since I hate glitter)” (Also pictured: Heirloom Oval Ring with breastmilk, pearl shimmer, and white glitter and our discontinued Hexagon earrings with breastmilk, pearl shimmer, and white glitter)

Stacking Rings

These three Stacking Rings in Yellow Gold - “I love this one because the colors were absolutely beautiful together”

This Heirloom Oval Ring in Yellow Gold with a breastmilk stone, locks of hair and gold flakes to resemble the sun - “the design is striking”


Ashley’s Favorites

Heirloom Oval Ring

This Heirloom Oval Ring in Silver - this customer requested an “ocean” design.

Oval breastmilk ring

This Oval Ring in Rose Gold with breastmilk, pearl shimmer, and copper/rose gold flakes in opposite corners


Terri’s Favorites

Heirloom Oval Ring Breastmilk jewelry

This Heirloom Oval Ring in Silver with a breastmilk stone, pearl shimmer, white pigment, rainbow shimmer light pink flakes, and umbilical cord flakes - “I love the colors and the ombre effect in this deisgn!”

Anniversary earrings Star Threader Earrings

These Star Threader Earrings in White Gold with flower petals and white pigment (no breastmilk) "- “These are my personal earrings and they’re my absolute favorite! The flower petals are from my wedding bouquet.”

breastmilk ring

This Hexagon Ring in Yellow Gold with a Hammered Band. Breastmilk stone, lock of hair, flower petals, and light pink flakes - “I love the simplicity of this ring and the colors are gorgeous!”

Minimalist Earrings

These Teeny Tiny Stud Earrings in Silver - “I love how minimalist these are! They’re so simple and perfect to wear in a second hole and every day!”


2022 brought a lot of new design ideas and challenges, but but Meghan and Ashley did an AMAZING job bringing your designs to life and creating some beautiful, memorable keepsake jewelry for our customers this year! We are forever gateful to our customers for their amazing kindness and support and we have been honorned to serve you another year! We look forward to all 2023 brings and even more beautiful and amazig design ideas from you guys!

Terri - General Manager at Milk + Honey Jewelry


Ready to design your keepsake jewelry? Click below to place your order!

Need some ideas for your design? Check out our Instagram page for LOTS of ideas and designs!

Not sure how to communicate your design idea to us? There are a few ways to do this!

1) Give us all the details of your design in the request section of your order form.

2) Let us know in the request section of your order form the date of an Instagram post that you would like us to use as inspiration when designing your jewelry..

3) Email us a sketch of your design after you’ve placed your order. You can do this by simply replying to your confirmation email with a picture of your sketch.

Still have questions? We’re happy to help! Email us at hello@milkandhoney.jewelry or submit a contact form and we’ll get back to you as soon as possible!